Originally posted April 14, 2014
Edited January 2016 to add:
I am amazed at all of the interest that this post has received since I first
posted it! Thank you each of you who have visited my blog. I would like
to let you know that I have recently posted new lace
books that you might be interested to see.
And I would so very much love to hear from you!
Feel free to leave a comment or email me. My email is located in the About Me box on the side bar where you can click to see my complete profile. And be looking for me to announce my new You Tube videos that I am working to share with you. I will post a notice on my sidebar when it's up and running!
All the best to you in your crafting fun!
Hello to you all! I hope this finds each of you doing well, and staying warm again!!
Can you believe the weather this year??
We've been trying to slowly get the yard looking nice...no easy task!!
But the weather has been lovely...until NOW!! ARGH!!
Anyway, on to the tutorial for the lace book.
This tutorial is only going to be with pictures, because I have no clue how to make a You Tube video!!
Anyone want to let me in on the secret, then I might be able to utilize that avenue!
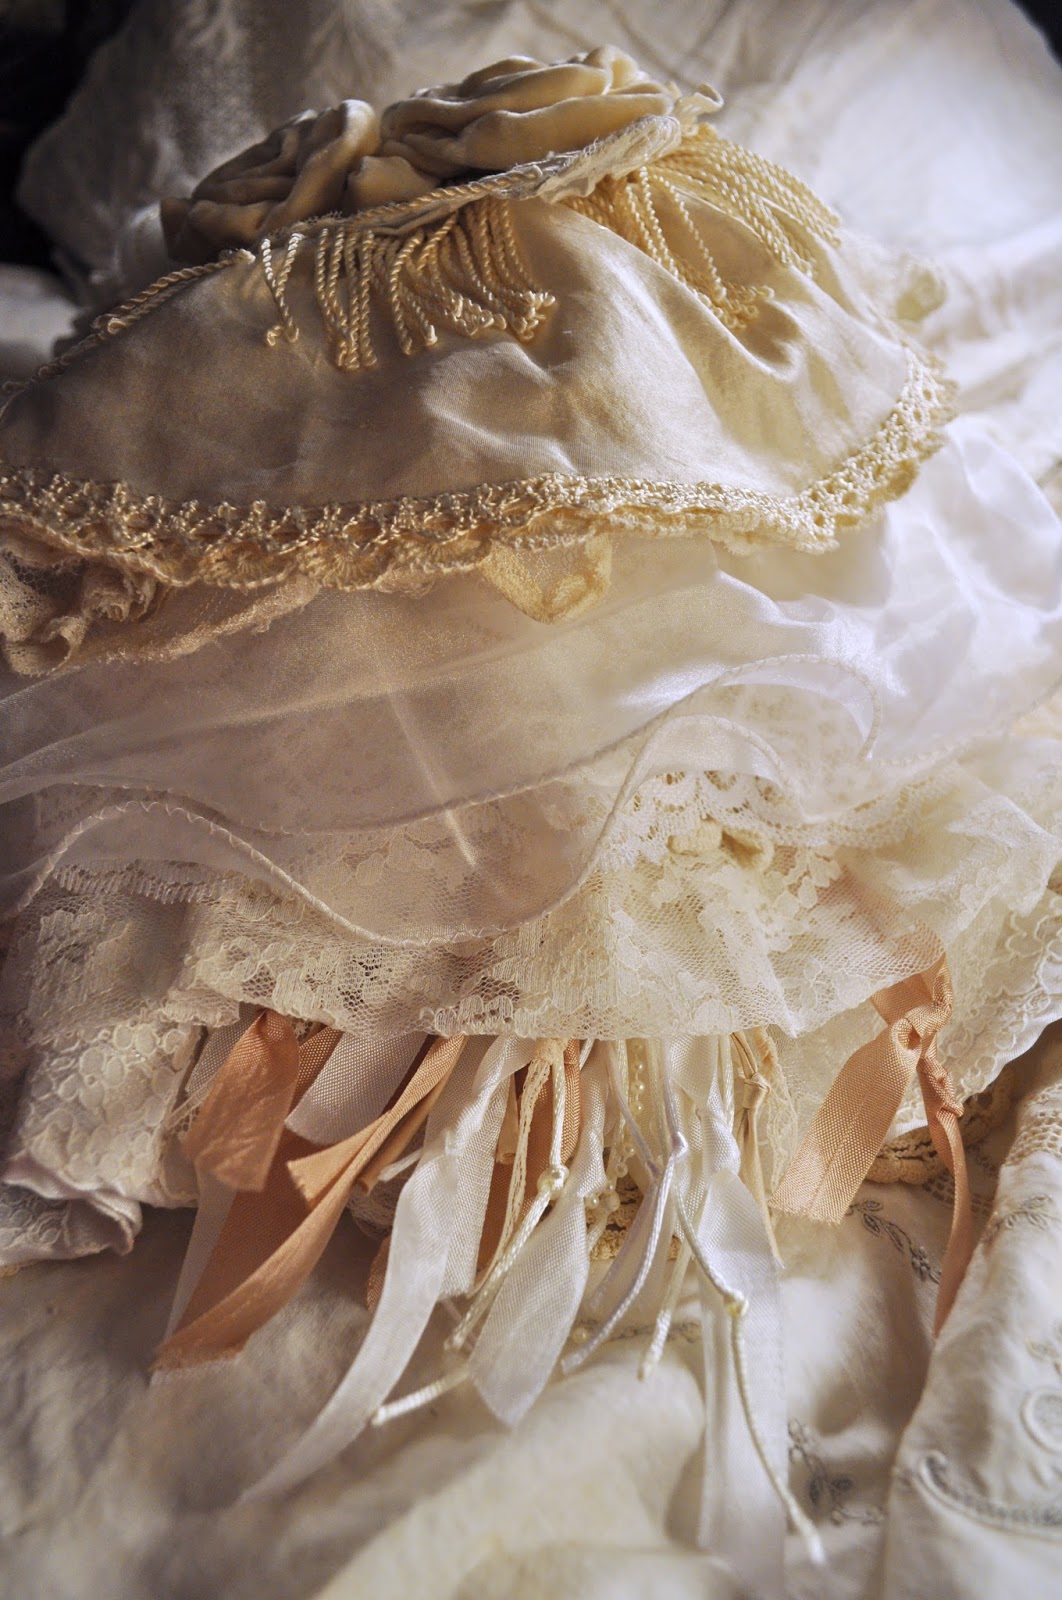
OK...the Lace Book that I made which I showed you completed on my previous post here, was a lot of fun for me to make. It was my first try at a lace book, and I was quite pleased with the result!

I began by going to Pinterest and starting a pinboard called Fabric and Lace Collage which you can look at here. I pinned any picture that was related to making books, journals, collages, tags, etc. which utilized laces, fabrics, trims, etc. I wanted a place where I could go to for inspiration, ideas, and how to's. The number of people who make these lovely books and journals and wall hangings astounds me with their ideas, tutorials, and gorgeous images. I wish I could talk to each person and thank them for their time and their willingness to share their ideas!! If you are one of them, then THANK YOU!!
To start, I found a You Tube video by Scrappin Happyxo which you can view here.
Jeannette gave a list of other tutorials (located in her description box). Her use of cloth napkins and doilies for pages made the base for her book. She clearly explains how she makes her books and the ideas were terrific.
I will show you pictures of my own lace book now, and how I continued on her ideas. Please note that I did not copy her ideas exactly, but I did use her basis for pages ideas. I did not use glue to attach any laces to my pages, but I did use it for the flowers on the front (above). Again, great tutorials out there on flower making! Please note: you do NOT need to use fabric napkins for your book, you could use any type of fabric.
For this book I used some old thin lovely lace edged napkins as the pages. Between the folds of the napkin I sandwiched two pieces of felt (see below) cut to just smaller than the lace edges, sewing with a machine around the edges to keep shut. I had to pin the felt and napkin "pages" together to keep the felt in place while I placed the rest of my laces etc. on the pages.
Below is an example of the beginning of a lace book that I am working on now, as I did not think at the time to take pictures as I started the first book!


All napkin pages are now stitched together and the felt inside still pinned.

When the napkins are all stitched with the felt inside each "page", I then cut a piece of muslin in a length long enough to be folded like an accordion (folded back and forth, back and forth), with enough left over to go over the front and back of the book. This is a way to attach each napkin page to the next napkin, making the actual book form. This example was a piece of bleached muslin cut across the folded original piece of yardage. The width of the material from the bolt was kept in tact, and a piece approximately 5 inches was used. I eyeballed the cut, and made sure the piece was shorter than both upper and lower edges of the actual napkin pages so that when finished, it would not show (see above).


I wanted the folds that would be attached to the inside of the napkin pages to be just large enough that I could easily stitch them to the insides of the pages, attaching them to both sides of the pages. One on the left page, one on the right page. These were used between two napkins, making them into the book form. After trying a number of times to calculate the actual size, I found it easier to eyeball it, thinking ahead about how thick I wanted the pages to be, allowing for things I would attach later. I left enough looseness between for what I thought I would need.


pinned on the left side of a napkin

Starting at the middle of the book, I pinned the center accordian fold to the left side of a napkin (above), then another accordian fold to the right side (below).

Matching the width of the previous fold, then using a ruler or straight edge to help make the entire length straight.


I continued pinning folds to the napkins, making the backing of the book from the accordion folds. When the napkins were all attached (pinned), I made any changes that I thought were necessary for the thickness of the book.


Then I got out my needle and thread and sewed the whole book together with stitches through the folds into the napkin 'page' and felt. The felt gave me a place to sew into similar to a quilt batting center. I did not want the stitches to show on the other side of the page where I was sewing, so the felt made an easy place to sew to. I used a double row of stitches on each fold, following the exterior of the folds, and leaving a slight bit of material between each fold for the width of each page. It made a very nice way to attach the napkin pages to each other. A final backing or binding of the book will come later.
Now. Once the basic book was finished, the fun part of decorating and embellishing comes.
PART 2 Can be found HERE
This post is long enough! So, get out your old lovelies and try your hand at making a lace book. I am so glad I decided to try one. Let me know if you have any questions!
Thank you so much for joining me!
I hope you each have a lovely spring (as soon as old man winter gets through with his last huff!!).
Blessings,
Doni
Below is an example of the beginning of a lace book that I am working on now, as I did not think at the time to take pictures as I started the first book!
Using napkins with matching designs made this project easy. First, I folded each napkin into a square so that the prettiest corner was located in the upper right hand corner, and I could open it from right to left like a page in a book.
Once the "page" was open, I lowered the inside part of the folded napkin down, then cut pieces of felt for each side, left and right. The felt is pink in the examples below.
Fold the lower portion back up, to cover the felt, and align.
Below is the napkin with the two pieces of felt inside, and folded together. I am peeling away the decorated upper right portion of the front so that the felt is exposed.
Note: If you want the felt to be seen through your design, leave it in place.
If you do NOT want the felt to be seen behind your design, now is the time to trim the felt along the design edge allowing the design to be without felt behind it.
For this example, I would trim the felt along the folded portion to remove it from the design area.
But I decided to leave the pink felt behind the flower motif to show through.
Here is the example of the napkin with the felt pieces inside, ready to be sewn around the outside edges. In the picture above I would sew around the bottom left, across the top, then down the right side, making sure the felt stays where it belongs by pinning it in place before sewing. I found it fine to leave my pins in the felt while I worked on the rest of the book, but you can tack it down with thread if you prefer.
All napkin pages are now stitched together and the felt inside still pinned.
When the napkins are all stitched with the felt inside each "page", I then cut a piece of muslin in a length long enough to be folded like an accordion (folded back and forth, back and forth), with enough left over to go over the front and back of the book. This is a way to attach each napkin page to the next napkin, making the actual book form. This example was a piece of bleached muslin cut across the folded original piece of yardage. The width of the material from the bolt was kept in tact, and a piece approximately 5 inches was used. I eyeballed the cut, and made sure the piece was shorter than both upper and lower edges of the actual napkin pages so that when finished, it would not show (see above).
I had 6 napkins to work with, therefore the center of my book was three pages in.
I wanted the folds that would be attached to the inside of the napkin pages to be just large enough that I could easily stitch them to the insides of the pages, attaching them to both sides of the pages. One on the left page, one on the right page. These were used between two napkins, making them into the book form. After trying a number of times to calculate the actual size, I found it easier to eyeball it, thinking ahead about how thick I wanted the pages to be, allowing for things I would attach later. I left enough looseness between for what I thought I would need.
approximate size of each accordion fold
pinned on the left side of a napkin
Starting at the middle of the book, I pinned the center accordian fold to the left side of a napkin (above), then another accordian fold to the right side (below).
Matching the width of the previous fold, then using a ruler or straight edge to help make the entire length straight.
finger press along the edge, then pin in place on the right side, making two napkins attached to each other with the two folded pieces.
The extra material left over on the front and back of the book from the accordion folds I pinned in place. It makes a nice "work cover" for while I am handling it so much and saves the extra material to the outside of the book in case I want to use it there. I found out that once it is cut...there is no going back!
Then I got out my needle and thread and sewed the whole book together with stitches through the folds into the napkin 'page' and felt. The felt gave me a place to sew into similar to a quilt batting center. I did not want the stitches to show on the other side of the page where I was sewing, so the felt made an easy place to sew to. I used a double row of stitches on each fold, following the exterior of the folds, and leaving a slight bit of material between each fold for the width of each page. It made a very nice way to attach the napkin pages to each other. A final backing or binding of the book will come later.
Now. Once the basic book was finished, the fun part of decorating and embellishing comes.
PART 2 Can be found HERE
This post is long enough! So, get out your old lovelies and try your hand at making a lace book. I am so glad I decided to try one. Let me know if you have any questions!
Thank you so much for joining me!
I hope you each have a lovely spring (as soon as old man winter gets through with his last huff!!).
Blessings,
Doni